Active Directory Services & User Creation
Lab Objective
Section titled “Lab Objective”This lab covers the end-to-end deployment of an enterprise directory services infrastructure on Windows Server. The deployment is divided into three key phases:
- AD DS Role Installation: Installing the binaries and management tools for Active Directory Domain Services.
- Domain Controller Promotion: Configuring the forest, establishing the root domain
rajkumar.local, and promoting the server. - OU & User Provisioning: Creating a structured Organizational Unit (
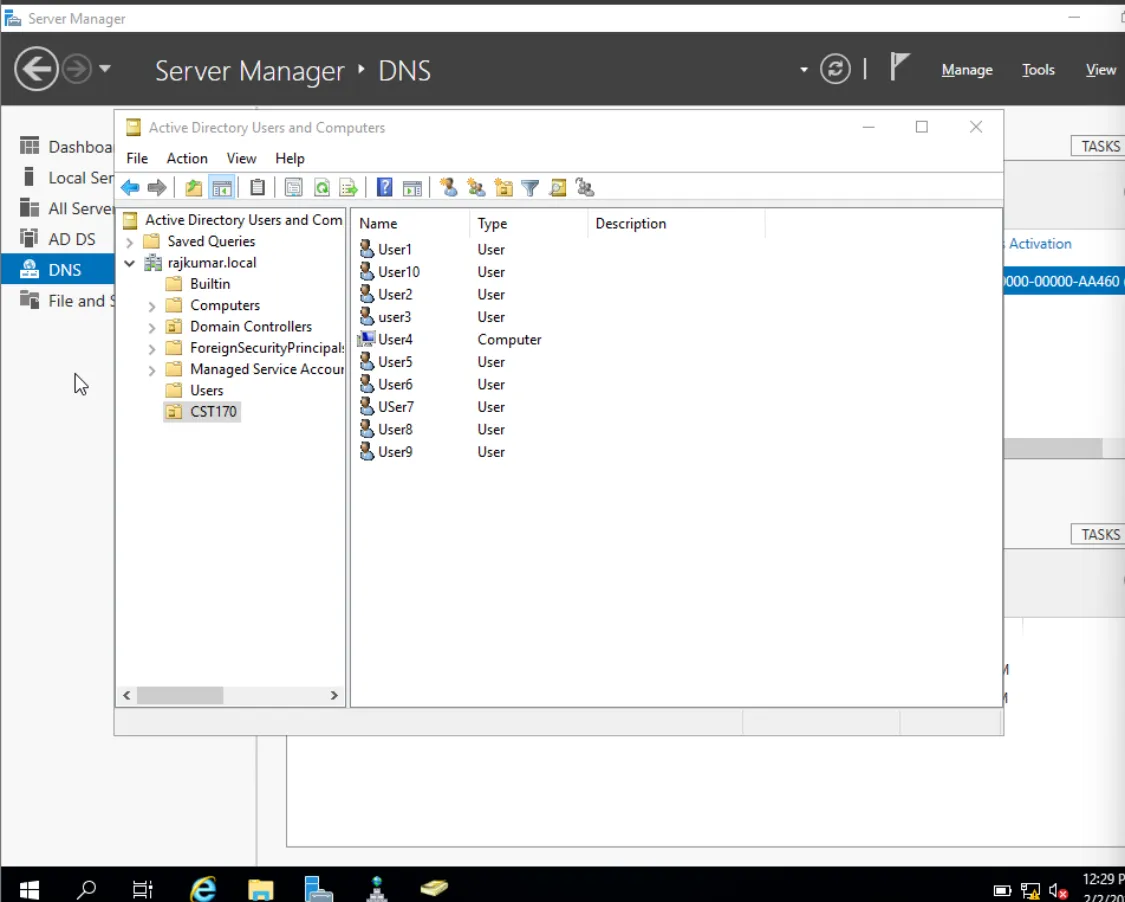
CST170) and provisioning 10 active directory user accounts.
Phase 1: Active Directory Domain Services Role Installation
Section titled “Phase 1: Active Directory Domain Services Role Installation”In this phase, we install the Active Directory Domain Services (AD DS) role and its associated remote administration tools onto the local server using the Server Manager dashboard.
Summary of Installation Steps
Section titled “Summary of Installation Steps”| Step | Action | Description |
|---|---|---|
| 1 | Launch Role Wizard | Start the “Add Roles and Features” wizard from Server Manager. |
| 2 | Select Installation Type | Choose “Role-based or feature-based installation”. |
| 3 | Select Target Server | Identify and select the destination server from the pool. |
| 4 | Select Server Roles | Select the “Active Directory Domain Services” role. |
| 5 | Add Features | Accept the required administrative and command-line features. |
| 6 | Review Features | Verify default features (such as Group Policy Management). |
| 7 | Review AD DS Info | Read the deployment guidelines and DNS prerequisites. |
| 8 | Confirm Selections | Configure automatic restart settings and verify changes. |
| 9 | Monitor Progress | Watch the progress bar as files are deployed. |
| 10 | Complete Installation | Verify success and close the wizard to begin promotion. |
Step-by-Step Installation Walkthrough
Section titled “Step-by-Step Installation Walkthrough”Step 1: Launch the Add Roles Wizard
Section titled “Step 1: Launch the Add Roles Wizard”Open the Server Manager dashboard, click on Manage in the upper-right corner, and select Add Roles and Features to launch the configuration wizard.
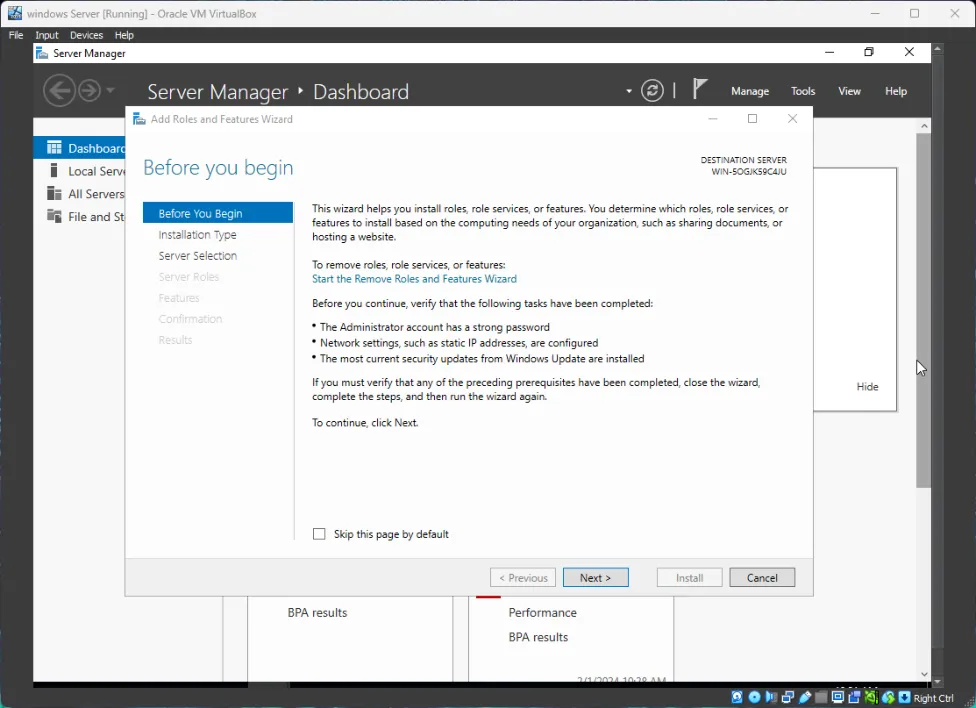
Step 2: Select the Installation Type
Section titled “Step 2: Select the Installation Type”Choose Role-based or feature-based installation and click Next to deploy the role onto a single server instance.
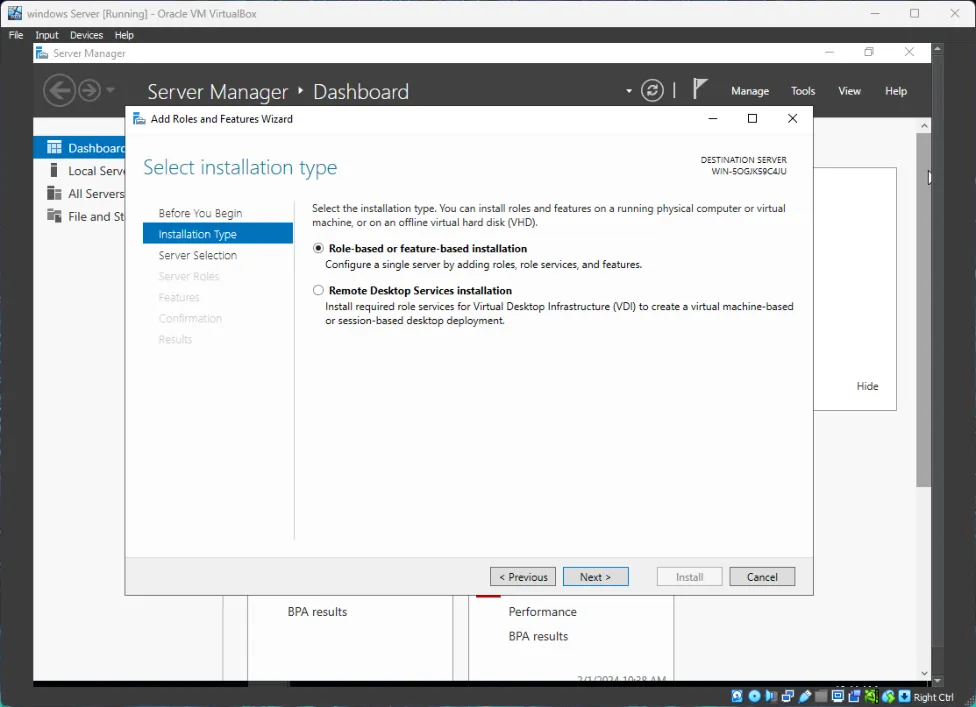
Step 3: Select the Destination Server
Section titled “Step 3: Select the Destination Server”Select the target server from the server pool. Verify that the correct server name and local IP address are highlighted.
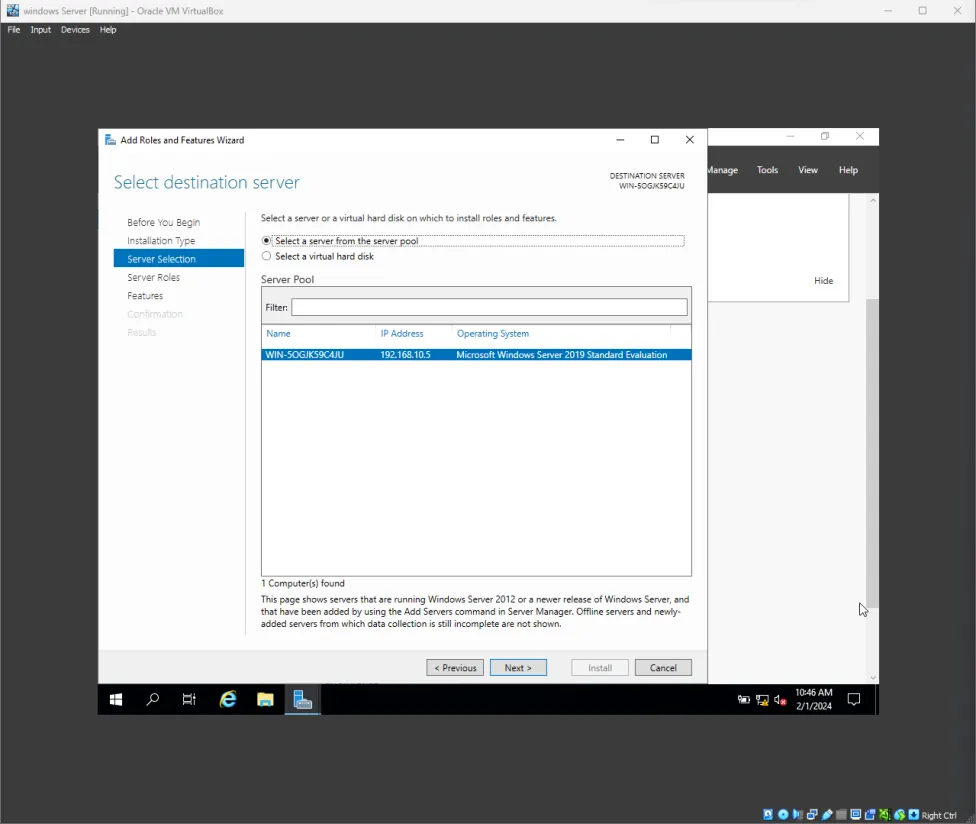
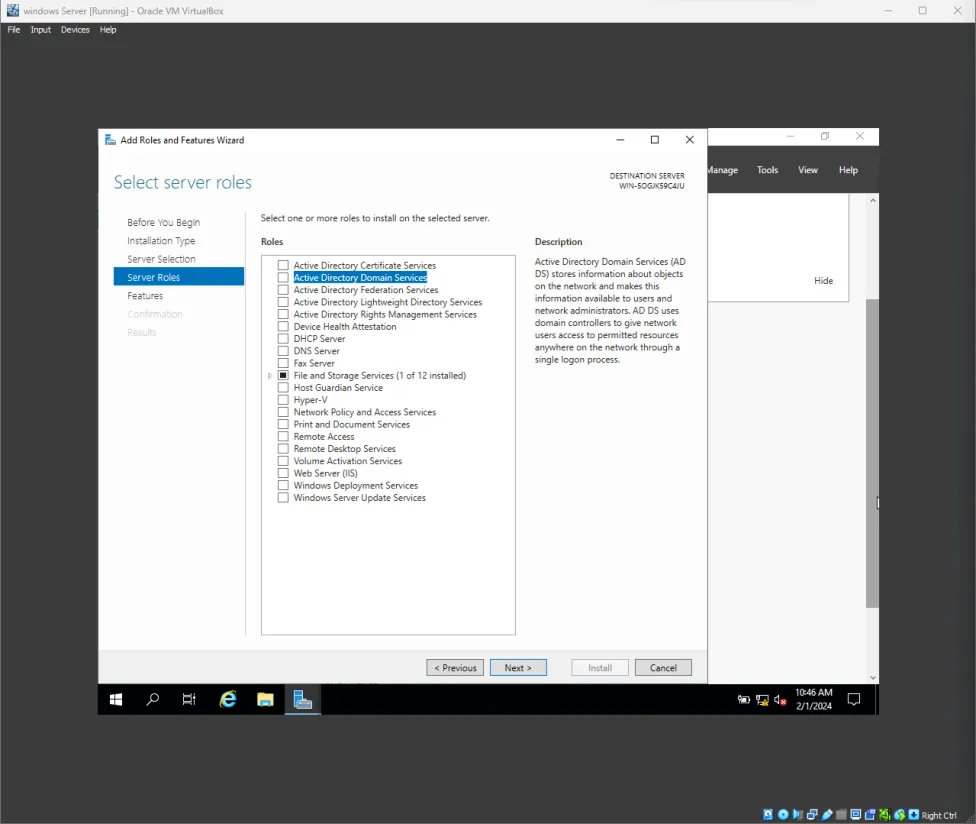
Step 4: Check Active Directory Domain Services
Section titled “Step 4: Check Active Directory Domain Services”In the list of server roles, select the checkbox for Active Directory Domain Services.
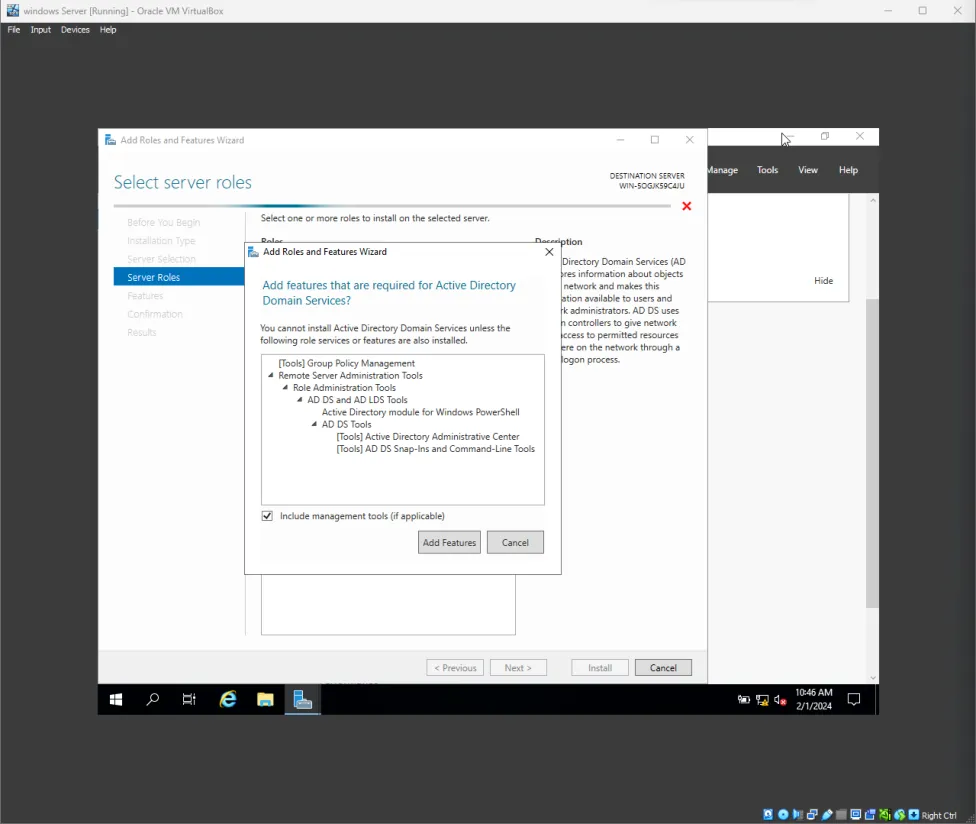
Step 5: Add Required Features
Section titled “Step 5: Add Required Features”A pop-up prompt will display the dependent features required for AD DS management (such as AD DS Tools, AD Administrative Center, and PowerShell modules). Click Add Features to proceed.
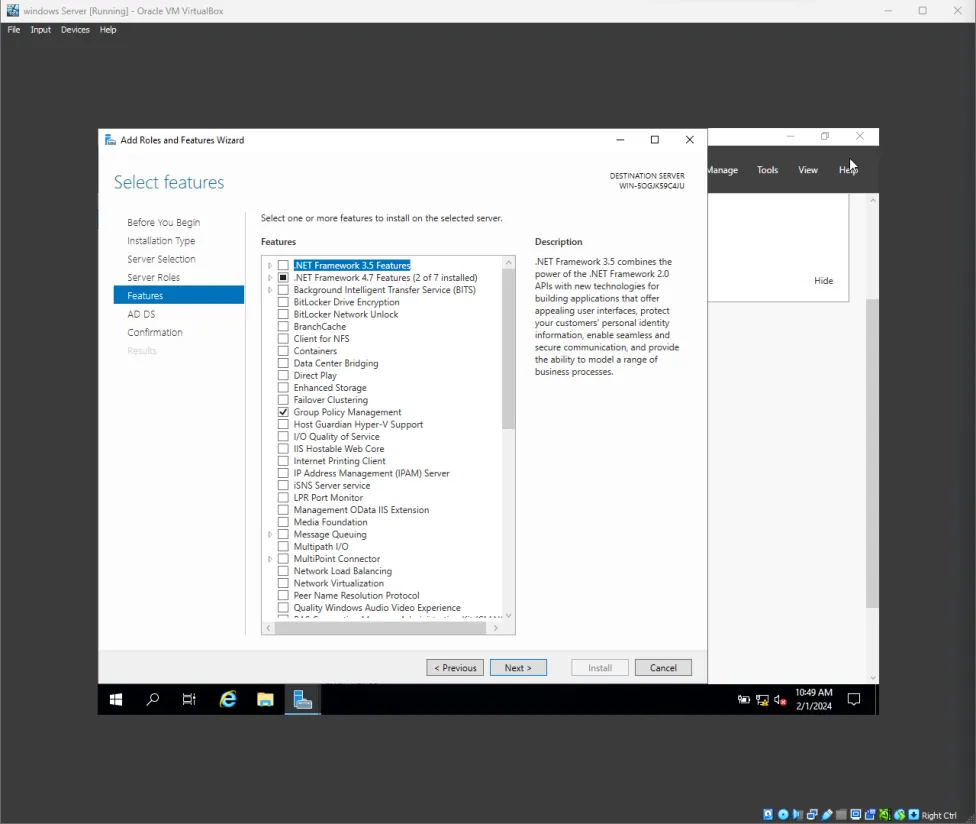
Step 6: Review Features List
Section titled “Step 6: Review Features List”Verify that the default features are selected (including Group Policy Management). Click Next without making additional changes.
Step 7: Read AD DS Information
Section titled “Step 7: Read AD DS Information”Review the information screen detailing what AD DS does, noting the recommendation to set up at least two domain controllers for redundancy in production environments.
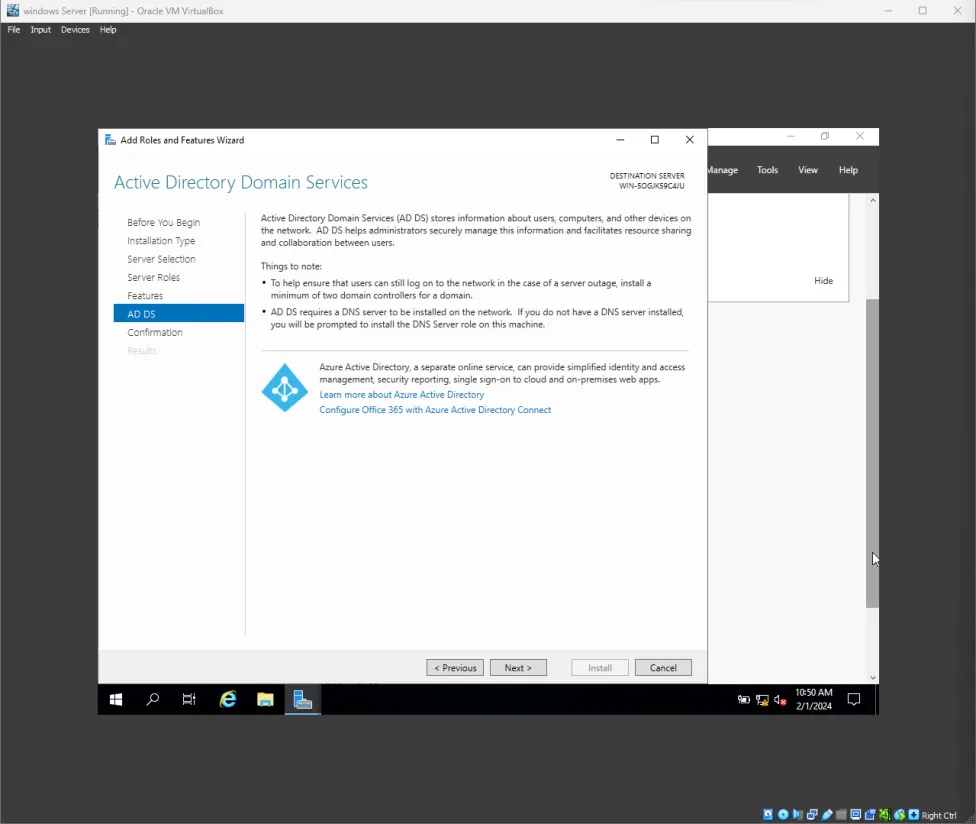
Step 8: Confirm Installation Selections
Section titled “Step 8: Confirm Installation Selections”Verify all selected roles and features. Optionally check the option to Restart the destination server automatically if required, then click Install.
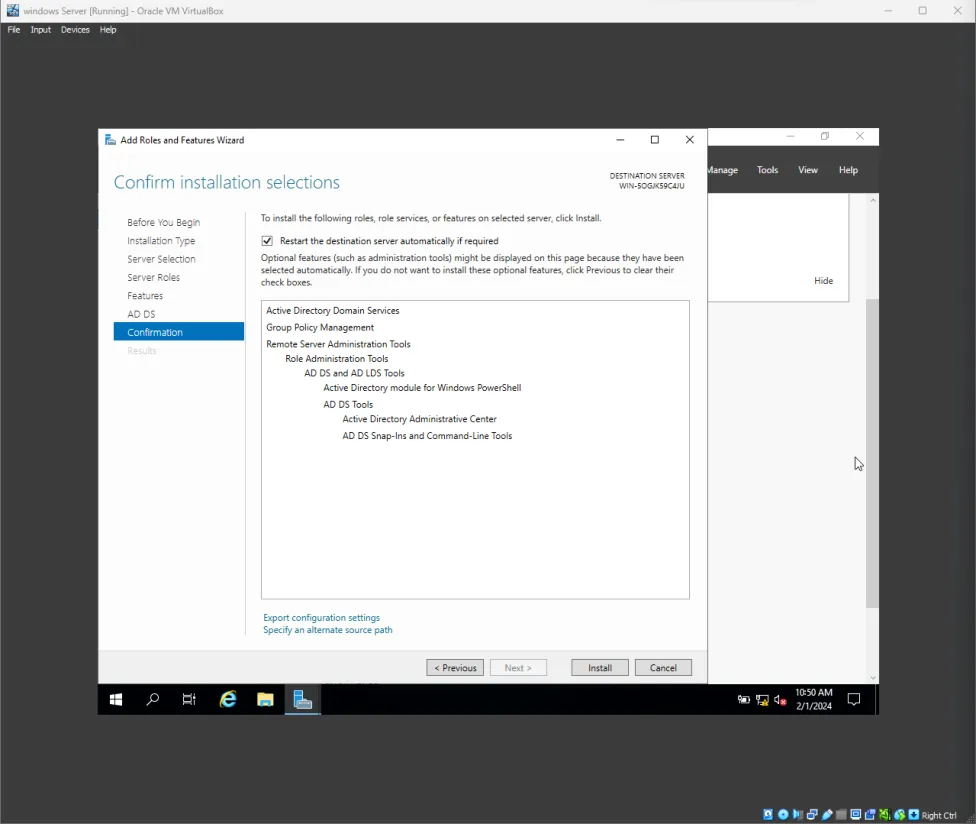
Step 9: Monitor Installation Progress
Section titled “Step 9: Monitor Installation Progress”Wait for the progress bar to complete. The wizard will show the status of the binary deployment.
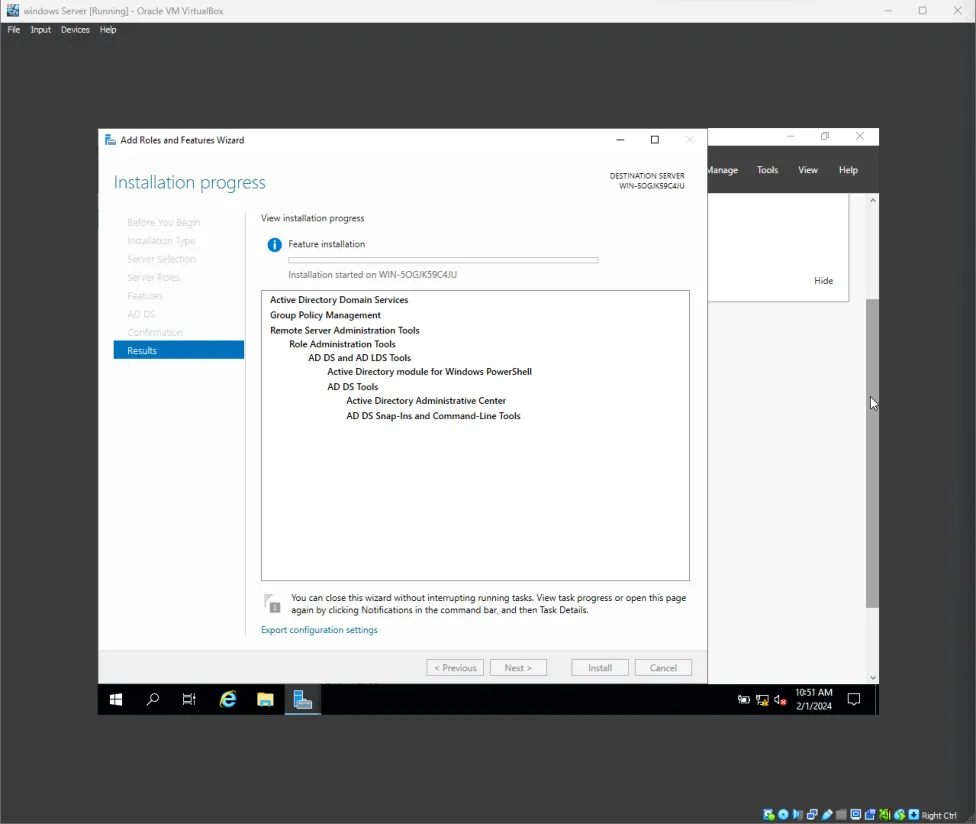
Step 10: Complete Role Installation
Section titled “Step 10: Complete Role Installation”Once the progress bar indicates Installation succeeded, click Close. Notice the warning flag in Server Manager prompting for post-deployment configuration.
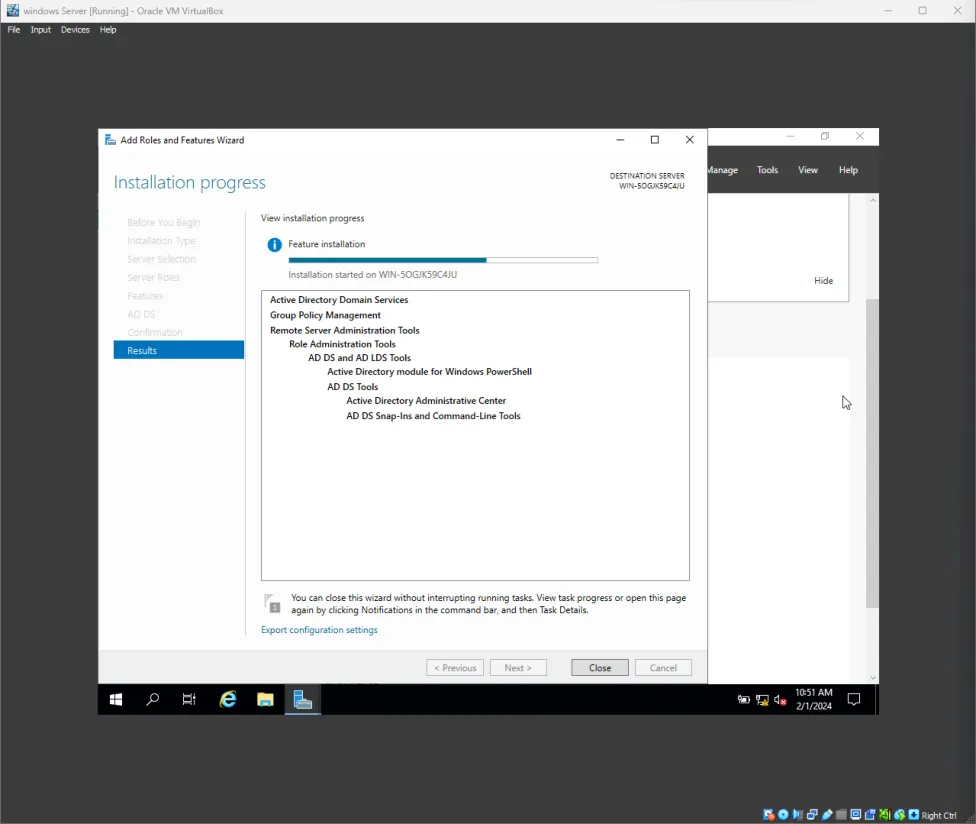
Phase 2: Promote the Server as a Domain Controller
Section titled “Phase 2: Promote the Server as a Domain Controller”Once the AD DS role files are installed, the server must be promoted to a Domain Controller to establish the new Active Directory forest.
Summary of Promotion Steps
Section titled “Summary of Promotion Steps”| Step | Configuration Window | Configuration Details |
|---|---|---|
| 11 | Deployment Configuration | Select “Add a new forest” and define the root domain rajkumar.local. |
| 12 | Domain Controller Options | Set functional levels, enable DNS/GC, and set a secure DSRM password. |
| 13 | DNS Options | Review the DNS delegation warning (safe to ignore for a new forest). |
| 14 | Additional Options | Confirm the auto-generated NetBIOS name: RAJKUMAR. |
| 15 | Database Paths | Define paths for the NTDS database, log files, and SYSVOL folder. |
| 16 | Review Options | Review the script and configuration parameters. |
| 17 | Prerequisites Check | Perform and pass the system readiness checks. |
| 18 | Installation & Promotion | Initiate the promotion; the server will reboot automatically. |
| 19 | Domain Sign-in | Log back in using the new domain credentials: RAJKUMAR\Administrator. |
| 20 | Service Verification | Open the management tools to verify active directory health. |
Step-by-Step DC Promotion Walkthrough
Section titled “Step-by-Step DC Promotion Walkthrough”Step 11: Deployment Configuration
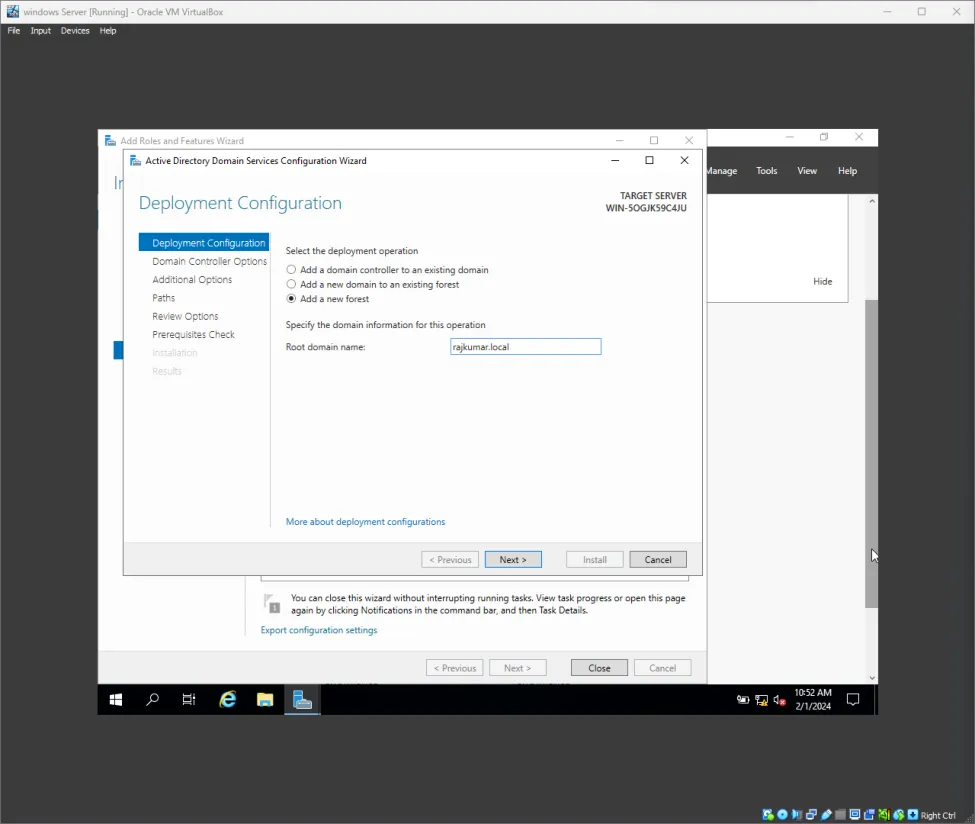
Section titled “Step 11: Deployment Configuration”Click the notification flag in Server Manager and select Promote this server to a domain controller. In the deployment configuration wizard, select Add a new forest and enter rajkumar.local as the Root domain name.
Step 12: Configure Domain Controller Options
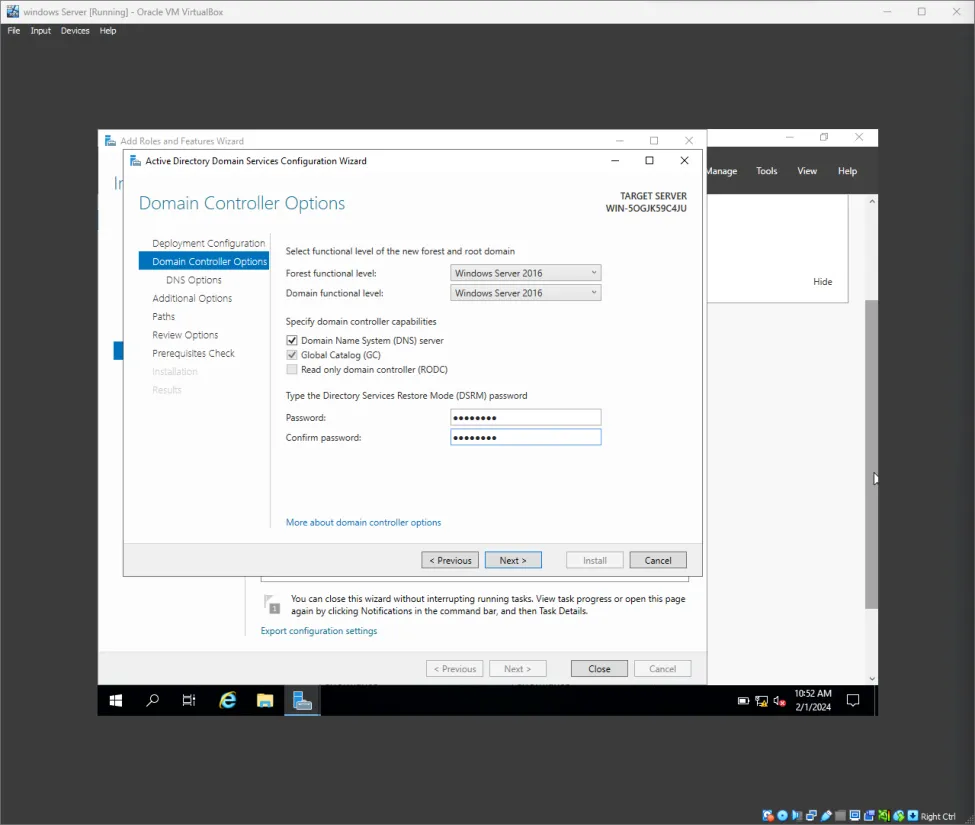
Section titled “Step 12: Configure Domain Controller Options”Keep the Forest and Domain functional levels set to Windows Server 2016 (or your current version). Ensure that Domain Name System (DNS) server and Global Catalog (GC) are checked, then specify a secure Directory Services Restore Mode (DSRM) password.
Step 13: DNS Options Review
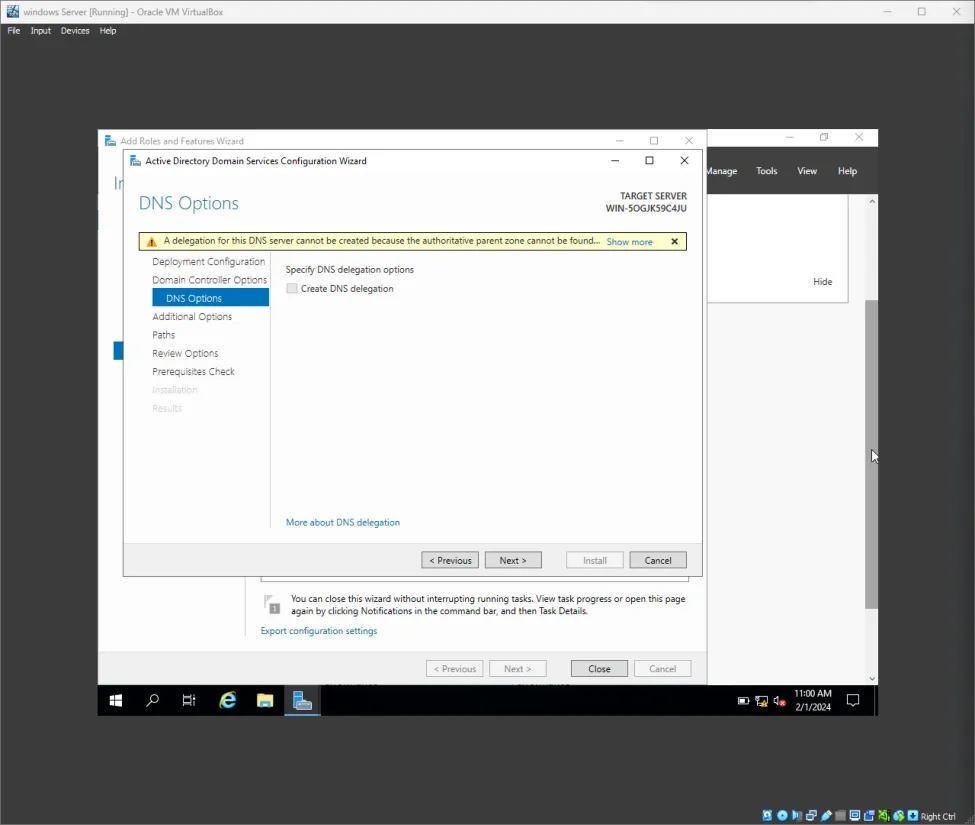
Section titled “Step 13: DNS Options Review”The wizard will display a warning that a delegation for this DNS server cannot be created. This is expected because we are creating a new root domain with no parent infrastructure. Click Next to bypass.
Step 14: NetBIOS Domain Name Verification
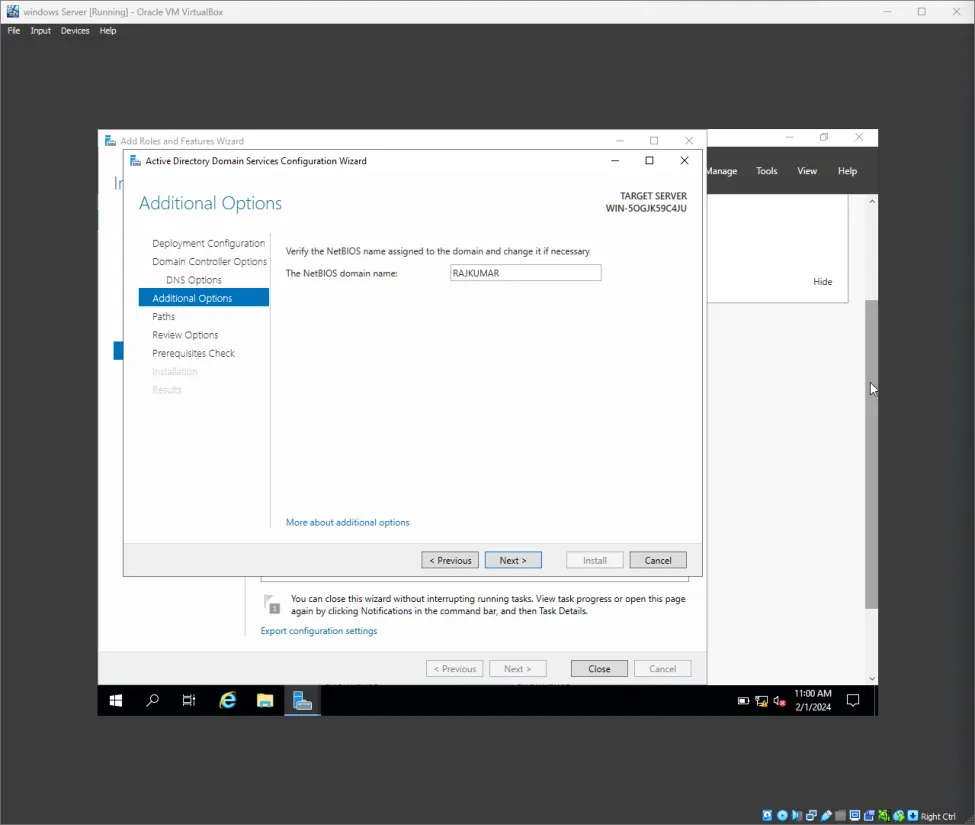
Section titled “Step 14: NetBIOS Domain Name Verification”The wizard will automatically determine the NetBIOS domain name. Verify that it is set to RAJKUMAR and click Next.
Step 15: Database, Log, and SYSVOL Paths
Section titled “Step 15: Database, Log, and SYSVOL Paths”Confirm the default file storage locations for the AD DS database, log files, and SYSVOL. Keep them as C:\Windows\NTDS and C:\Windows\SYSVOL for standard configurations.
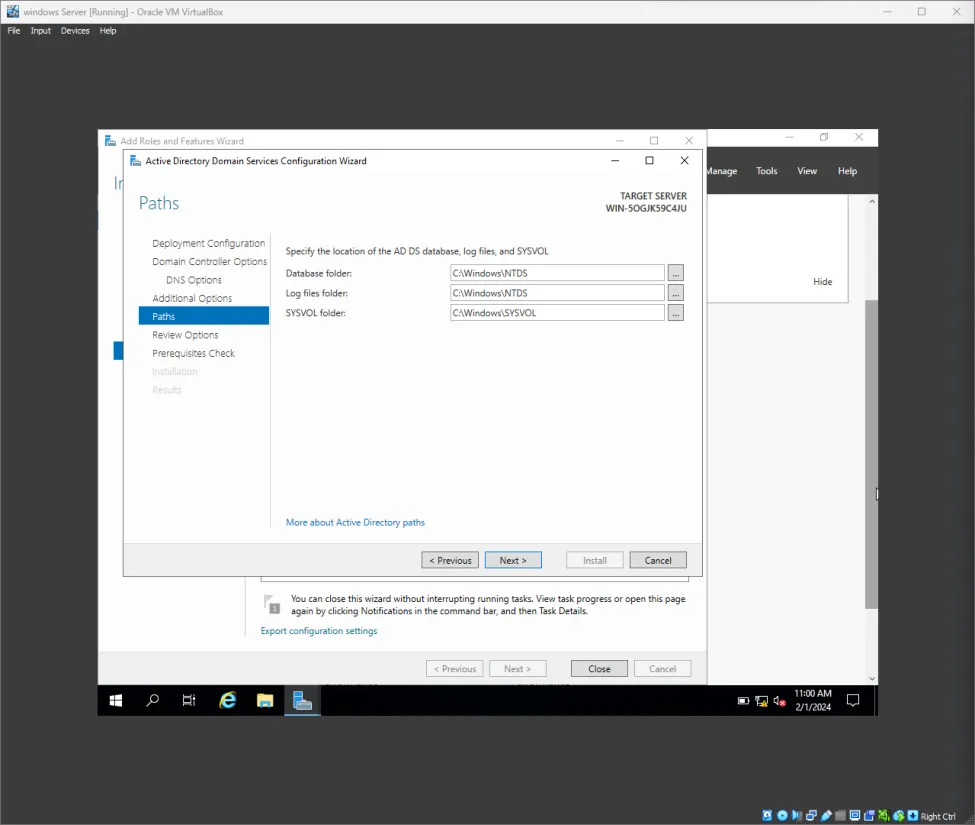
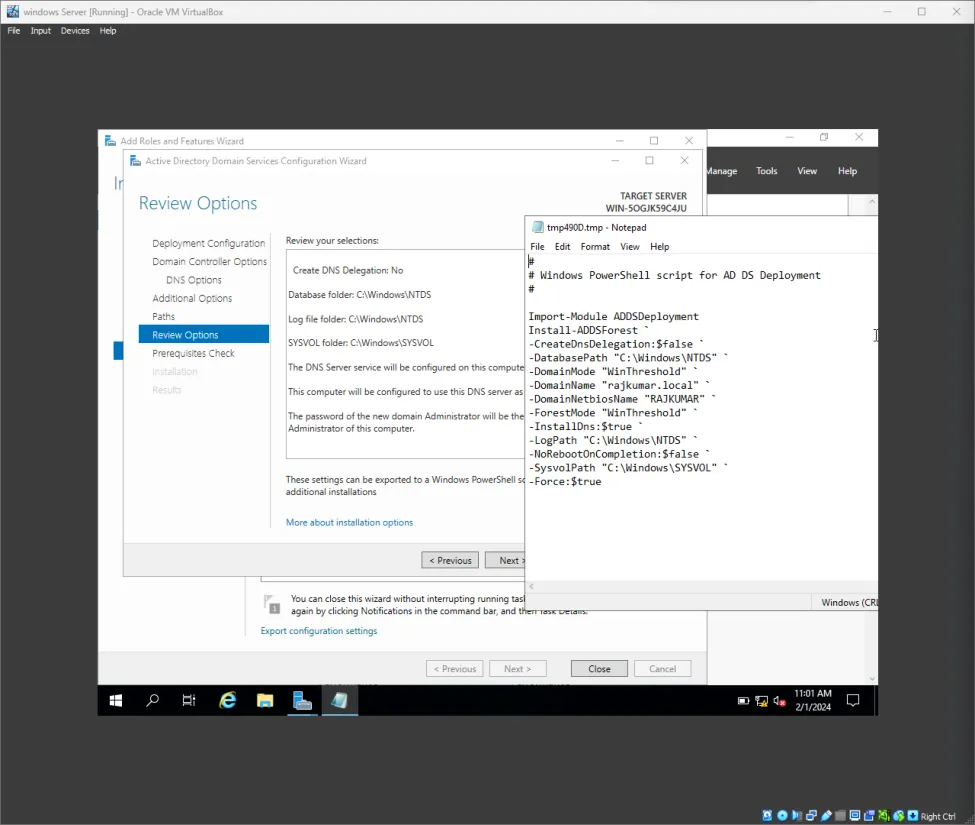
Step 16: Review Selection Options
Section titled “Step 16: Review Selection Options”Review the configuration summary. You can click View Script to export the equivalent PowerShell script for automated installations. Click Next to continue.
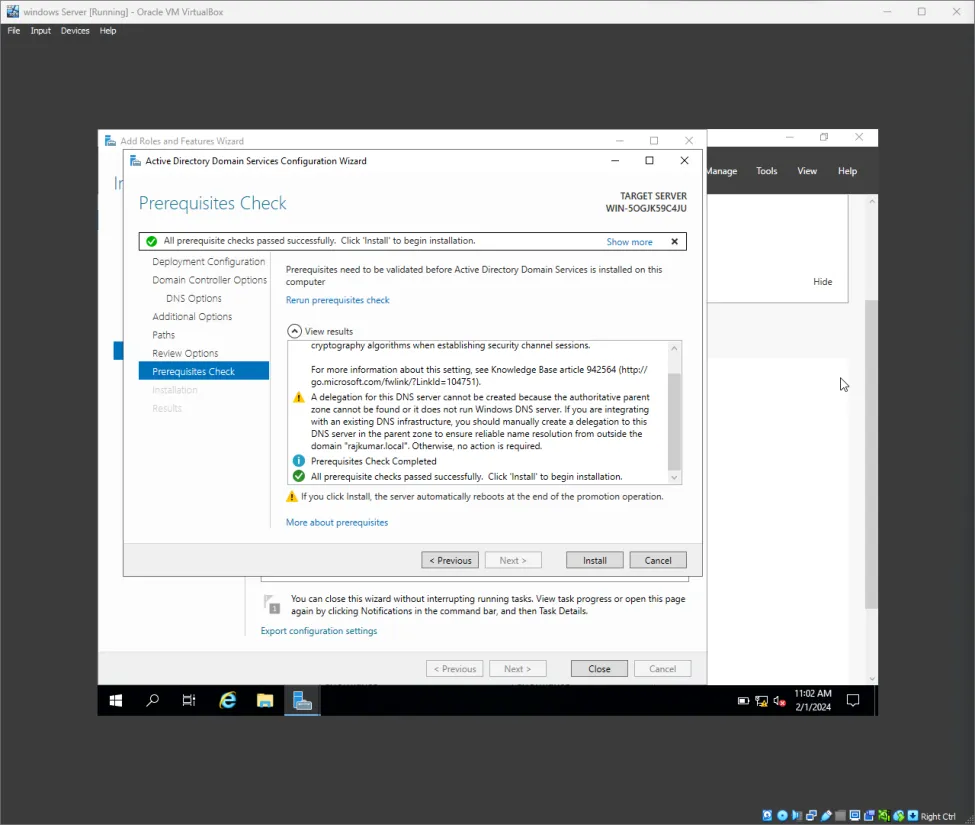
Step 17: Prerequisite Check Validation
Section titled “Step 17: Prerequisite Check Validation”The wizard will run prerequisite checks to ensure the server is ready for promotion. Once the checks pass successfully, click Install.
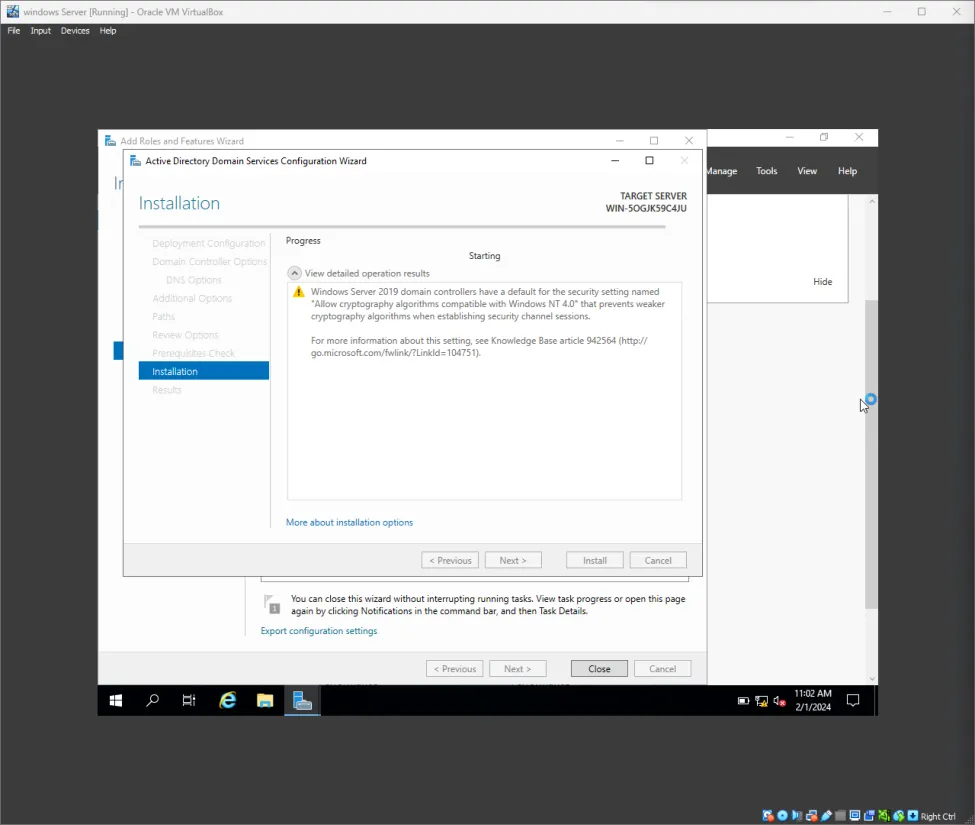
Step 18: Execute Installation
Section titled “Step 18: Execute Installation”The wizard will configure the directory services, partition database, and set security configurations. The server will automatically restart upon completion.
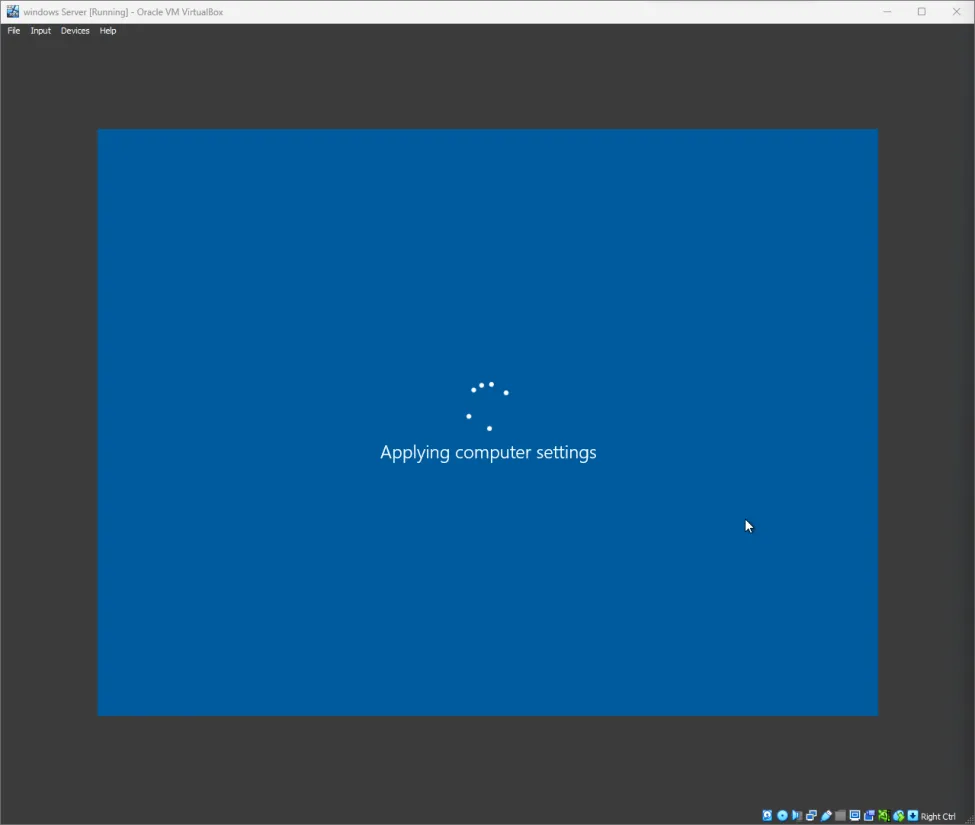
Step 19: Sign In to the Domain
Section titled “Step 19: Sign In to the Domain”After the reboot, the login screen will show the domain prefix. Enter the administrator credentials to log in as RAJKUMAR\Administrator.
Step 20: Verify Services
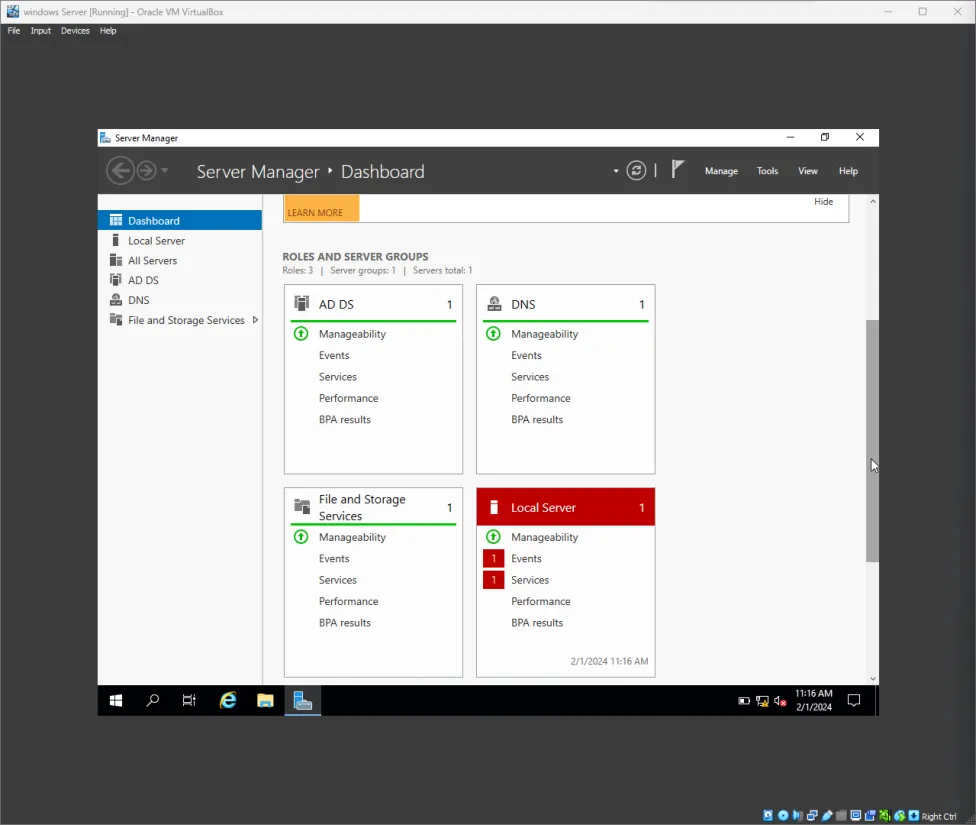
Section titled “Step 20: Verify Services”Open Server Manager and verify that AD DS and DNS services are running and showing green/healthy status indicator lights.
Phase 3: Create User Accounts using Active Directory Users and Computers
Section titled “Phase 3: Create User Accounts using Active Directory Users and Computers”To organize resources and user accounts, we create a custom Organizational Unit (OU) and provision 10 user accounts within it.
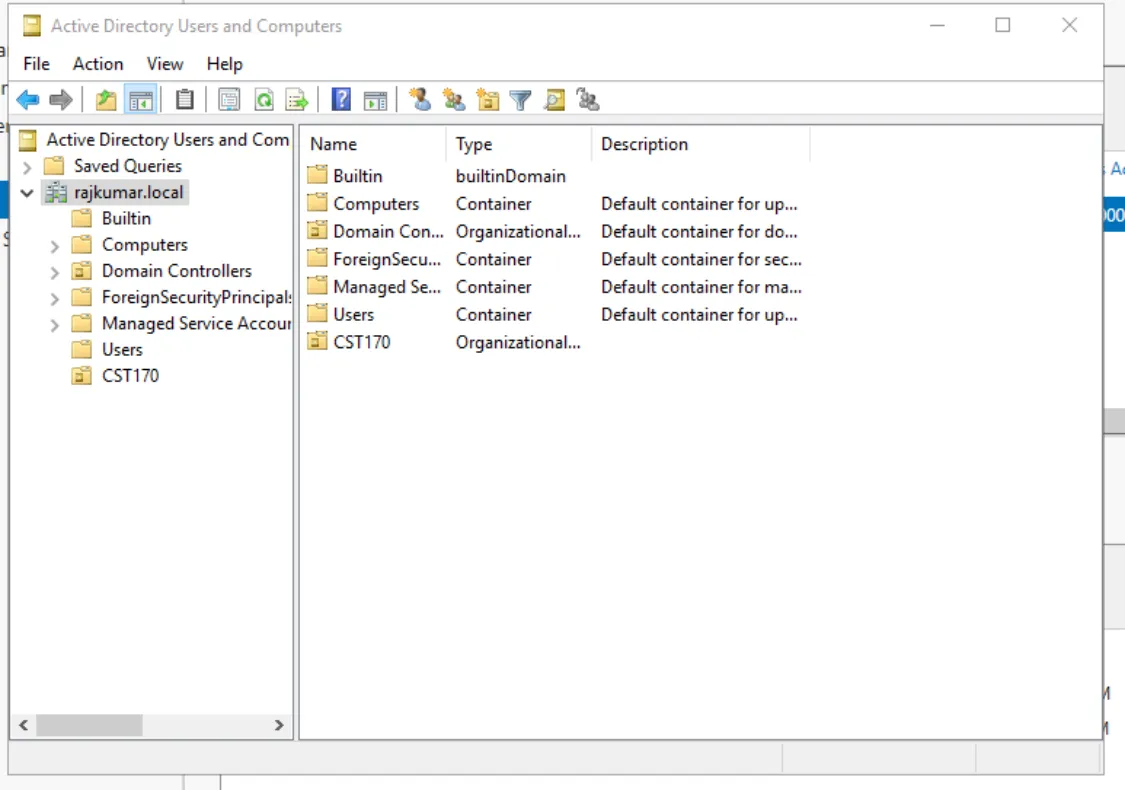
Step 21: Create the Organizational Unit (OU)
Section titled “Step 21: Create the Organizational Unit (OU)”- Open the Active Directory Users and Computers console from Tools.
- Right-click the root domain
rajkumar.local, select New, and click Organizational Unit. - Name the new OU CST170 and click OK.
Step 22: Provision the 10 User Accounts
Section titled “Step 22: Provision the 10 User Accounts”- Inside the CST170 OU, right-click the empty space, select New, and click User.
- Create 10 user accounts (e.g. User1 to User10, or custom-named accounts) by entering their First Name, Last Name, and User Logon Name.
- Define secure passwords for each account, configure logon policies (such as forcing a password change at first logon or setting passwords to never expire), and click Finish.